
Note: To allow access to your accessories from the outside (WAN), follow this TUTO.
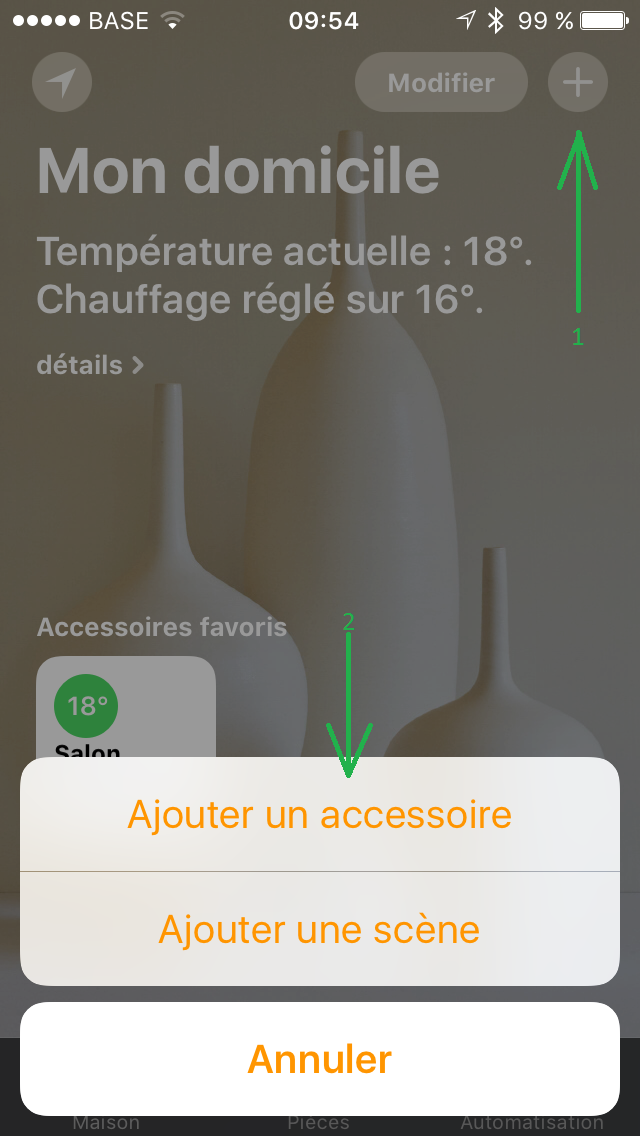
Go to the Home application of your iDevice;

In to the left, click on the +;
Select Add an accessory;
If your Homebridge installation went well, and you are on the same LAN with your iDevice and your Raspberry PI, normally you should see your accessory named Homebridge_MForge:

Click on the Homebridge_MForge accessory;
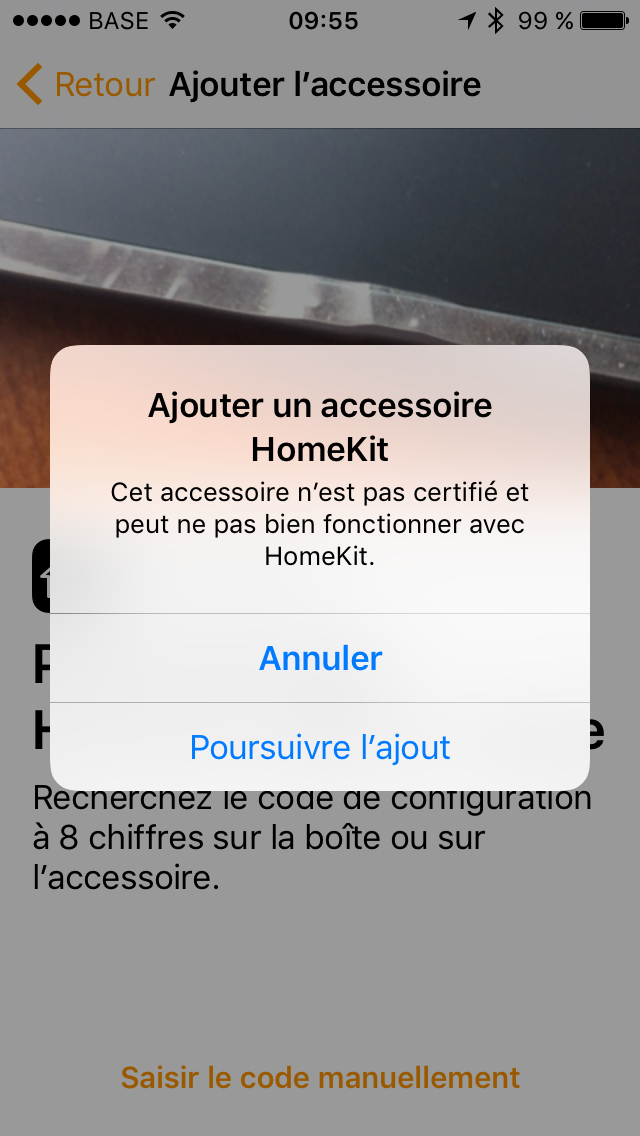
the iOS asked you if you want to add an accessory HomeKit, click continue adding;
Here, you have a choice, or you scan the code on the screen of your PC, or you click on enter code manually;
My Homebrige starts automatically, I do not see this code, so I’m going to enter it manually.
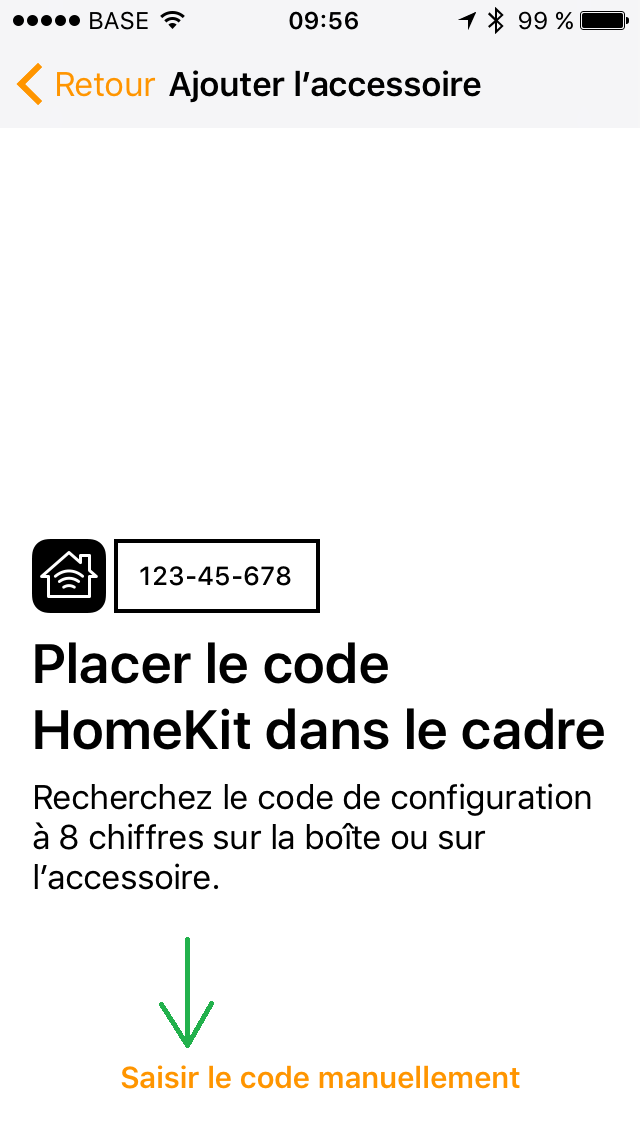
Enter the code that you see on this screen or that you have initialized in the file config.json beside the tag pin, in our example we used the code 131-55-254;

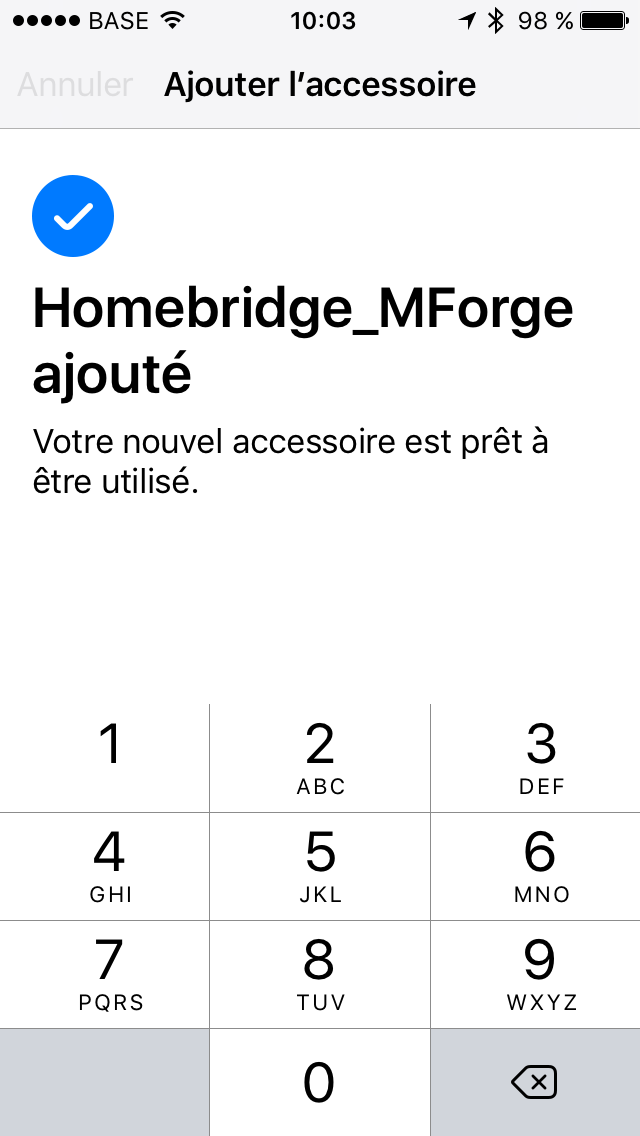
You will see the pairing procedure after that your Homebridge_MForge will be added as new accessory and ready to be used.
Then you get on the next screen:
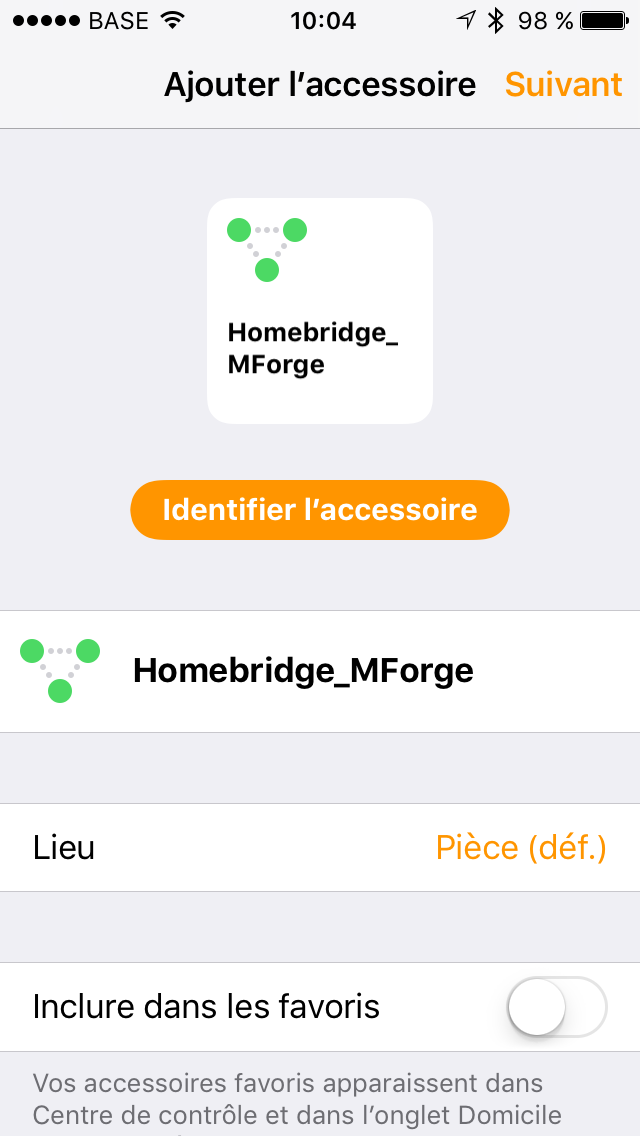
If you wish, you can change the name of your “Homebridge” personally let him thus.
At the top right of the screen, click on next;
Here, the application detects your Piece (def.) Garage door:
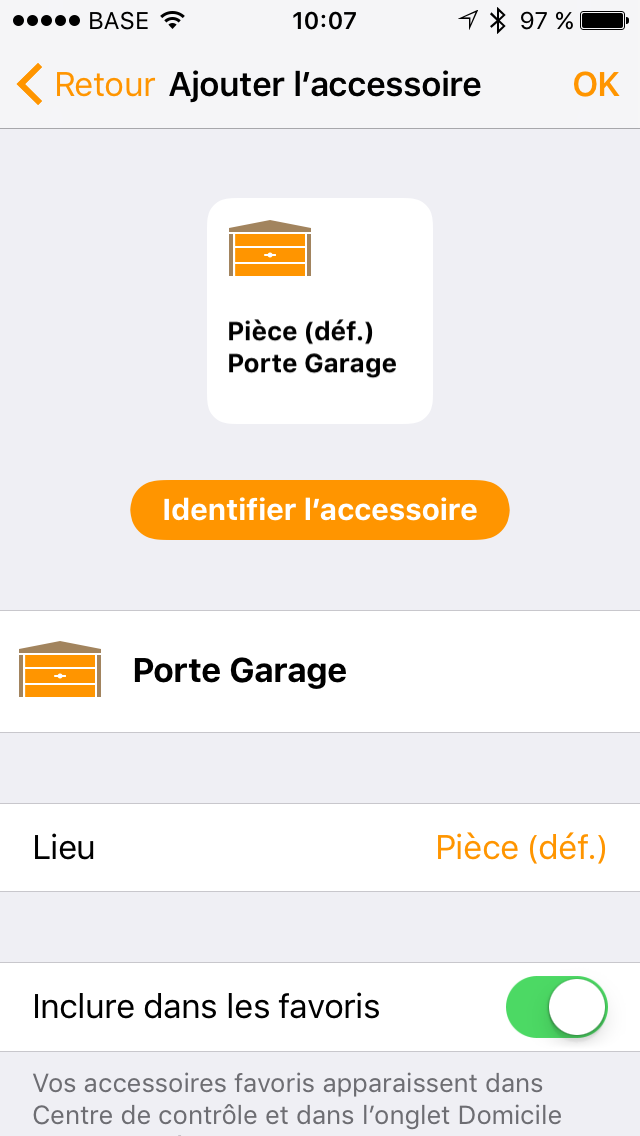
Click OK in the top right of the screen.
Your accessory “Garage door” is now available on the starting screen of the “Home app.

OK, well done, feel free to share this tutorial. Thank you 🙂
