
[Last updated: 02/12/2019]
Prerequisite for this tutorial : Raspbian Installation.
Note: I tested the commands of this tutorial on a Raspberry Pi 1 model B revision 2, Raspberry Pi 3 and a Raspberry Pi Zero W.
If you wish, connect to the Raspberry PI your keyboard and your screen.
1: Start of the Raspberry Pi
Connect a network cable to your Raspberry PI.
Connect the micro-USB cable to your Raspberry Pi and to a 5V power supply, this will start your Raspberry PI.
If your screen is connected, during startup you will see a lot of information appear on the screen.
If you don’t have a connected screen, you can login with SSH.
2: Login
When the boot process is complete, you will be prompted for a Login and a Password.
Connect with login pi and raspberry as password.
3: Commande prompt
If you have the version of Raspbian with the graphical interface, launch a command prompt.
4: Configuration
Type the following command : sudo raspi-config
5: SD card space
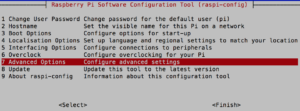
Select Advanced options and press ENTER.
Select Expand Filesystem, press ENTER and wait the end of the operation.
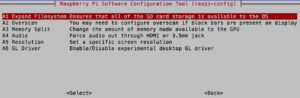
Once finished, press ENTER and you will come back as the main menu.
6: Change the password (Optional)
Select Change User Password.
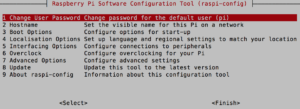
Raspbian informs you that you will change your password, press ENTER.
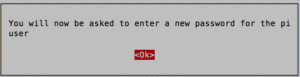
NOTE: When you type your new password, nothing appears on the display, it is typical of LINUX, so don’t worry, relax, take your time, type the keys one by one 🙂
Type your new password and press ENTER.
Enter again your password, then confirm by pressing ENTER

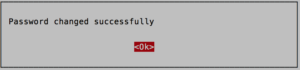
You receive a confirmation message. Press ENTER to exit this menu.
7: SSH activation (Optional)
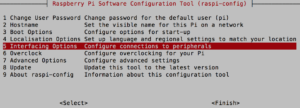
In the configuration menu main , select Interfacing Options;
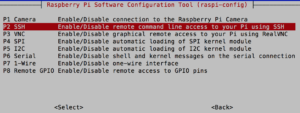
In the new window select “SSH” and press ENTER.
With the arrow keys to select “YES“, then press ENTER.
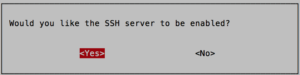
You receive the confirmation that the SSH is enabled.
8: End of the configuration
In the main menu, press TAB, to select FINISH, then press ENTER.
If you are asked to restart, do it, if he don’t ask, type the following command : sudo reboot now.
Now, go take a coffee, a break 🙂
9 : Change the Hostname (Optional)
Type the following command : sudo raspi-config
Select Hostname and tap ENTER.
Enter a name BUT only lowercase letters and numbers from 0 to 9 are allowed, so avoid all other characters.
Entrez par exemple “raspi0w“.
Press TAB to go on OK and press ENTER.
Restart the PI with the command : sudo reboot now.
10 : Only for the Raspberry Pi Zero W, set up the Wifi connection
11: Define a Static IP (Optional)
12: Disconnection of the devices (Optional)
When the Raspberry will be restarted, as SSH is now enabled, you can use another PC to connect on it, and it will be my case.
Before you unplug everything, it would be interesting to find the IP address of your Raspberry PI, to do this: follow the guide 🙂
To unplug the devices, let’s turn off the Raspberry with the command: sudo shutdown now.
Once off, disconnect the power supply and all that is no longer necessary.
We put the Raspberry PI in a corner of the office and restart by plugging in it the power supply.
OK, well done, feel free to share this tutorial. Thank you 🙂